

Beacon Athletics
VIEW FULL ARTICLE HERE – includes Full Graphics
1. Create concrete anchors.
A. Build three forms. Each form will require (2) 15″ long 2x4s, (2) 18″ long 2x4s, and (1) 18″ x 18″ piece of ½” plywood or OSB board. Nail, screw and/or glue the pieces together as shown in Drawing 1. When finished, the inside of the box should be 15″ x 15″, the same size as your base.
B. Position the anchor on the “X”. Using a chalk line or a pencil and straight edge, draw straight lines from corner to corner on the inside bottom of the form making an “X” (see Drawing 2). Center your anchor (1″ or 1 ½”) on the “X” so that the sides are parallel to the sides of the wooden form. Be sure that the flared end of the anchor is at the bottom of the form box.
C. Fill with concrete. Mix an 80 lb bag of Redi-Mix concrete as directed on the package. Have someone hold the base anchor in position. Fill the form to the top with the concrete mix and allow one day to cure.
2. Locate the base anchor positions on your field.
(Assuming home plate is in place and a centerline can be established.)
A. Find the center of 2nd base. With the centerline in place, refer to the Field Dimensions Diagrams to find the correct Infield Hypotenuse dimension (letter C on the diagram). Measure with a steel measuring tape from the apex of home plate (following the centerline) to the distance indicated for the Infield Hypotenuse. Place a tarp pin or nail at that spot on the centerline. This is the center of 2nd base.
B. Measure to 1st base. From the 2nd base pin the base distance [A] where 1st base will be positioned. Using a second steel tape, measure the required base distance from the point of home plate to 1st base. Where the two tape measures form a right angle, set another tarp pin or nail. This is the back foul corner of 1st base.
C. Measure to 3rd base. Now repeat the process to position 3rd base. From the 2nd base pin measure the proper base distance to 3rd base. Using a second tape, measure from the point of home plate to 3rd base. Where the tape measures meet to form a right angle is where you place your tarp pin. This is the back foul corner of 3rd base.
D. Make sure it’s accurate. Measure the hypotenuse from the 1st base pin to the 3rd base pin. This is the same as the home plate to 2nd base hypotenuse. If these are not equal, re-measure your base locations. Once the 1st-to-3rd and home-to-2nd distances match, your base locations are accurately marked.
3. Install 1st and 3rd base anchors.
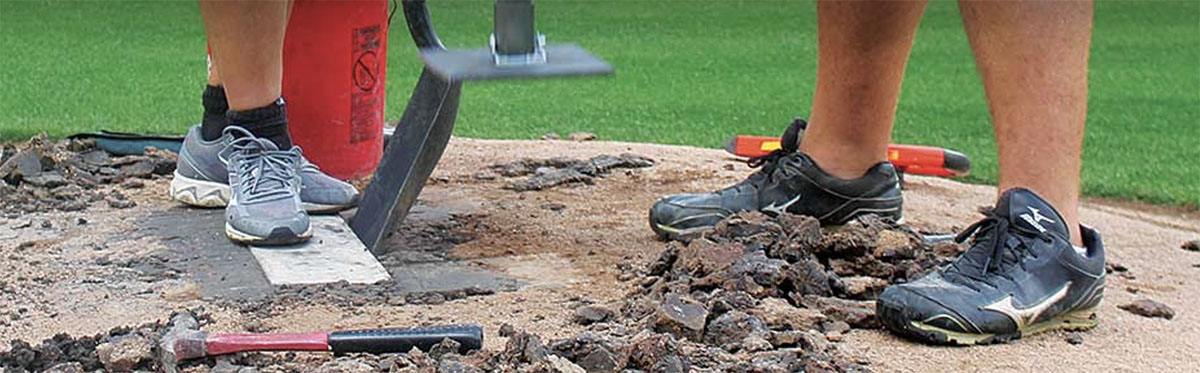
A. String it up and dig a hole. Starting at the point of home plate, run a string line up the foul edge of the foul line well past the 1st or 3rd base pin. This string line should be slightly to the foul side of your 1st or 3rd base pin.
To be installed correctly, the base should cover the foul line as it runs under the base. Next, excavate an area about 2′ square where the base should be located (see Drawing 3). Excavate this area knowing the pins you set indicate the back foul corner of the base.
Most metal anchors are about 8″ long and your 2′ x 2′ hole for the anchor should be 8 ½” to 8 ¾” deep. The top of the anchor post should always be ½” to ¾” below the surface so it is never caught when nail dragging. Make sure that the bottom of the hole is level and well compacted.
B. Place the anchor. Remove one of the concrete anchors from its form by turning it upside down and pounding the form with a rubber mallet to loosen. Make sure that there is no concrete inside the steel anchor post. To maintain proper drainage, clear any excess concrete if necessary. Using a 2×4, create a bridge across the hole and over the anchor post. Ensure that there is a gap of 1/2″ to 3/4″ from the top of the anchor post to the bottom of your 2×4 bridge. If not, remove the anchor, correct the sub-grade, and remeasure the depth..
C. Is it level? Once your depth is set, make sure the anchor is level. Use a torpedo level on the sides of the anchor post. If necessary, adjust the grade under the concrete anchor until it is level.
D. Position the anchor accurately. Using the string line as your guide, maneuver the anchor so one edge of the concrete is on the string line, the back foul corner of the concrete is where your pin was placed, and the rest of the concrete is on the “fair side” of your string (see Drawing 4). Measure from the point of home plate to the back foul corner of the concrete anchor to ensure correct base placement. You may place a base in the anchor to make for easier measuring. After adjusting your concrete anchor accordingly for correct placement, recheck for levelness and proper depth. Adjust if needed.
E. Bury the anchor. When all three parameters are met (distance, depth, levelness), the anchor can be buried. Add soil a few inches at a time. Compact thoroughly before adding the next few inches. Continue until the level of soil in the excavated area matches the grade of the surrounding infield skin. Compact the soil, then moisten and apply topdressing if used.
4. Install 2nd base anchor.
A. Dig a hole and level it out. The 2nd base pin you placed marks the base’s exact center. Therefore, excavating 1′ out in all directions from the base pin will create a 2′ square area. Follow the same process of excavation and leveling as you did in Step 3 with the 1st and 3rd base anchors.
B. Find the exact center of 2nd base. Place the concrete anchor in the hole. Stretch your steel measuring tapes from the back foul corners of both 1st and 3rd base toward 2nd base. The exact center of 2nd base is where the two tapes form a right angle at the proper base distance. (See letter A in the Field Dimensions Diagrams.) Center the anchor post at that point (see Drawing 5), making sure the sides of the concrete anchor are parallel to the foul lines.
C. Bury the anchor. When all three parameters are met (distance, depth and levelness), the anchor can be buried, just as you buried the 1st and 3rd base anchors.
5. Test each base, troubleshoot if necessary.
With the anchors now in place, test them by installing the bases to see how they sit on the infield skin surface. The base will sit flush to the skin surface with no gaps. If you see gaps from the base sitting up too high, troubleshoot these common installation problems:
- The steel anchor post is not level (plumb).
- The infield skin in not level, and it does not match the surrounding grade causing low areas around the base.
- How old are your bases? It is possible the bottom edges are curled up.
All of these problems present a risk to players. You should correct any of these conditions immediately to reduce any risk of injury.
Source: Beacon Athletics
https://ballfields.com/baseball-field-dimensions/setting-base-anchors/

“NEW” Amateur Sports Added !
We Can Save More Money In 2024 !
26 Different Amateur Sports
Teams, Officials, Tournaments, & Facilities

0 Comments